
Toyota RAV4 (XA50) 2019-2026 Owners Manual: Using an anchor bracket (for top tether strap)
â– Anchor brackets (for top tether strap)
Anchor brackets are provided for each rear seat.
Use anchor brackets when fixing the top tether strap.
Outboard rear seats
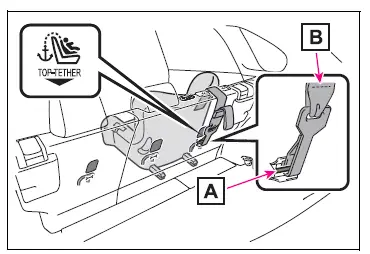
- Anchor brackets
- Top tether strap
Center rear seat

- Anchor bracket
- Top tether strap
â– Fixing the top tether strap to the anchor bracket
Install the child restraint system in accordance to the operation manual enclosed with the child restraint system.
Outboard rear seats
1. Remove the head restraint.
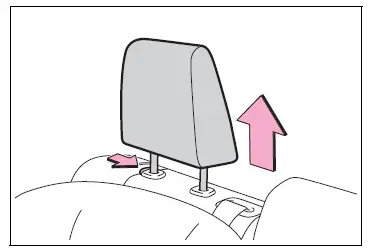
2. Latch the hook onto the anchor bracket and tighten the top tether strap.
Make sure the top tether strap is securely latched.

- Hook
- Top tether strap
3. If the head restraint does not interfere with the child restraint system installation, install the head restraint.
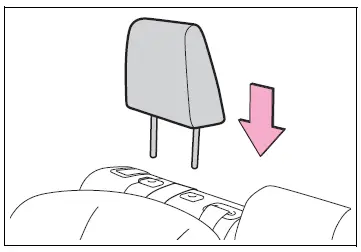
Center rear seat
1. Adjust the head restraint to the upmost position.
If the head restraint interferes with your child restraint system, and the head restraint can be removed, remove the head restraint.
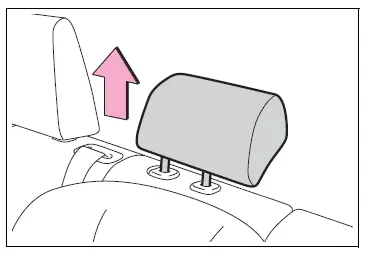
2. Latch the hook onto the anchor bracket and tighten the top tether strap.
Make sure the top tether strap is securely latched.
When installing the child restraint system with the head restraint being raised, be sure to have the top tether strap pass underneath the head restraint.

- Hook
- Top tether strap
â– Laws and regulations pertaining to anchors
The LATCH system conforms to FMVSS225 or CMVSS210.2.
Child restraint systems conforming to FMVSS213 or CMVSS213 specifications can be used.
This vehicle is designed to conform to SAE J1819.
WARNING
â– When installing a child restraint system
Observe the following precautions.
Failure to do so may result in death or serious injury.
- Firmly attach the top tether strap and make sure that the belt is not twisted.
- Do not attach the top tether strap to anything other than the anchor bracket.
- After securing a child restraint system, never adjust the seat.
- Follow all installation instructions provided by the child restraint system manufacturer.
- Center rear seat: When installing the child restraint system with the head restraint being raised, after the head restraint has been raised and then the anchor bracket has been fixed, do not lower the head restraint.
 Child restraint system
fixed with a child restraint
LATCH anchor
Child restraint system
fixed with a child restraint
LATCH anchor
â– Child restraint LATCH
anchors
LATCH anchors are provided for
the outboard rear seats.
â– When installing in the rear
outboard seats
Install the child restraint system
in accordance to the operat ...
 Emergency assistance
Safety Connect
Safety Connect is a subscription-
based telematics
service that uses Global
Positioning System (GPS)
data and embedded cellular
technology to provide
safety and security features
to sub ...
Other materials:
Precaution
Notice:
Perform the reset memory procedures (a/t
initialization) when replacing the automatic transaxle
assembly, engine assembly or ecm (see page ax-18).
Hint:
Reset memory cannot be completed by only reconnecting
the cable to the negative (-) battery terminal.
Caution:
When using compresse ...
Automatic transmission
Select the shift position
depending on your purpose
and situation.
Shift position purpose
and functions
P - Parking the vehicle/
starting the engine
R - Reversing
N - Neutral
D - Normal driving*1
S - S mode driving*2
*1:Shifting to the D position allows
the system to select a gear suitable
for ...
Removal
Hint:
Use the same procedures for the rh side and lh side.
The procedures listed below are for the rh side.
Remove no. 2 Seat hinge cover lh
Fully tilt the seatback forward.
Attach the 2 claws and clip.
Pull the hinge cover in the direction indicated by the
arrow ...
