
Toyota RAV4 (XA50) 2019-2026 Owners Manual: Operating HomeLink
Press the appropriate HomeLink button. The HomeLink indicator light should turn on.
The status of the opening and closing of a garage door is shown by the garage door operation indicators.
Vehicles with auto anti-glare inside rear view mirror
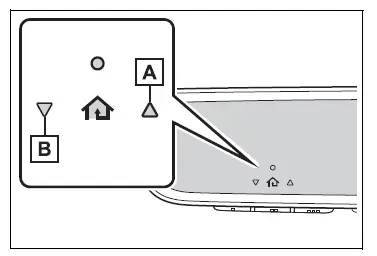
- Opening
- Closing
Vehicles with Digital Rearview Mirror
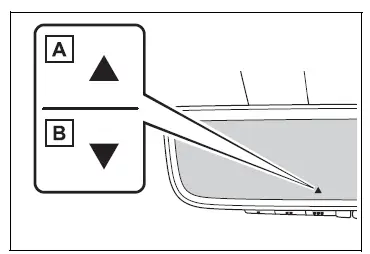
- Opening
- Closing
This function is only available if the garage door opener motor used is a compatible device.
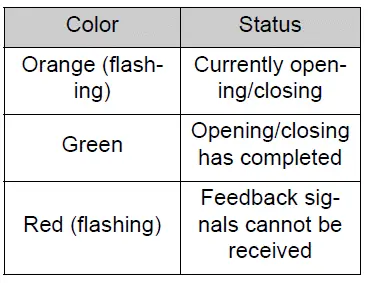
The indicators can operate within approximately 820 ft. (250 m) of the garage door. However, if there are obstructions between the garage door and the vehicle, such as houses and trees, feedback signals from the garage door may not be received.
To recall the previous door operation
status, press and release
either HomeLink buttons 
and  or
or
 and
and
 (vehicles
with auto anti-glare inside rear
view mirror),  and
and

or  and
and
 (vehicles
with Digital Rear-view Mirror)
simultaneously. The last
recorded status will be displayed
for 3 seconds.
Erasing the entire HomeLink memory (all three codes)
Press and hold the 2 outside buttons for 10 seconds until the HomeLink indicator light changes from continuously lit (orange) to rapidly flashing (green).
If you sell your vehicle, be sure to erase the programs stored in the HomeLink memory.
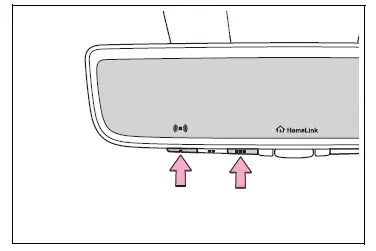
 Programming HomeLink
â– Before programming
HomeLink
During programming, it is possible
that garage doors,
gates, or other devices may
operate. For this reason,
make sure that people and
objects are clear of the
g ...

Other materials:
AHB (Automatic High
Beam)
The Automatic High Beam
uses an in-vehicle front
camera to assess the brightness
of streetlights, the
lights of vehicles ahead etc.,
and automatically turns the
high beams on or off as necessary.
WARNING
â– Limitations of the Automatic
High Beam
Do not overly rely on the Automatic
High Beam. Always ...
Parts location
System diagram
Hint:
The abs and traction actuator (skid control ecu)
detects and stores steering sensor and yaw rate
sensor dtcs and performs dtc communication by
receiving information from the steering sensor and
yaw rate sensor.
The ecm uses the can communication sy ...
Components
(2005/11-2006/01)
...
