Toyota RAV4 (XA50) 2019-2025 Owners Manual: Programming HomeLink
â– Before programming HomeLink
- During programming, it is possible that garage doors, gates, or other devices may operate. For this reason, make sure that people and objects are clear of the garage door or other devices to prevent injury or other potential harm.
- It is recommended that a new battery be placed in the remote control transmitter for successful programming.
- Garage door opener motors manufactured after 1995 may be equipped with rolling code protection. If this is the case, you may need a stepladder or other sturdy, safe device to reach the "Learn" or "Smart" button on the garage door opener motor.
â– Programming HomeLink
Steps 2 through 4 must be performed within 60 seconds, otherwise the HomeLink indicator light will stop flashing and programming will not be successfully completed.
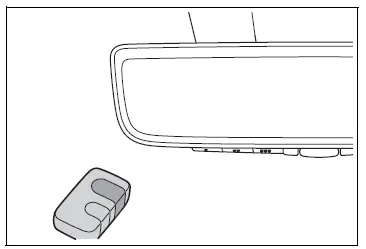
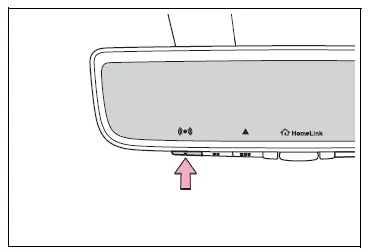
1. Vehicles with Digital Rearview Mirror: Press the HomeLink button or menu button
When the HomeLink button is pressed:
Homelink Training Tutorial will be displayed to assist you programming the HomeLink.
When Homelink Training Tutorial is displayed, follow the instructions displayed.
When the menu button is pressed:
Press the menu button  and
and
select the "Set Up >". Homelink
Training Tutorial will be displayed
to assist you programming the
HomeLink.
When Homelink Training Tutorial is displayed, follow the instructions displayed.
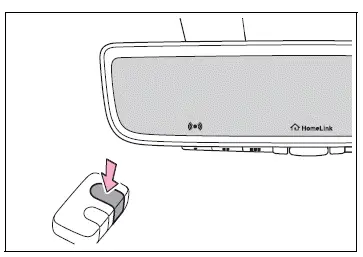
2. Press and release the HomeLink button you want to program and check that the HomeLink indicator light flashes (orange).
3. Point the remote control transmitter for the device at the rear view mirror, 1 to 3 in. (25 to 75 mm) from the HomeLink buttons.
Keep the HomeLink indicator light in view while programming.
4. Program a device.
Programming a device other than an entry gate (for U.S.A. owners)
Press and hold the remote control transmitter button until the HomeLink indicator light changes from slowly flashing orange to rapidly flashing green (rolling code) or continuously lit green (fixed code), then release the button.
Programming an entry gate (for U.S.A. owners)/Programming a device in the Canadian market
Press and release the remote control transmitter button at 2 second intervals, repeatedly, until the HomeLink indicator light changes from slowly flashing orange to rapidly flashing (green) (rolling code) or continuously lit (green) (fixed code).
5. Test the HomeLink operation by pressing the newly programmed button and observing the HomeLink indicator light:
- HomeLink indicator light illuminates:
Programming of a
fixed code device has completed.
The garage door or other device should operate when a HomeLink button is pressed and released.
- HomeLink indicator light
flashes rapidly: The garage
door opener or other device is
equipped with a rolling code.
To complete programming, firmly press and hold the HomeLink button for 2 seconds then release it.
- If the garage door or other device does not operate, proceed to "Programming a rolling code system".
6. Repeat the steps above to program another device for any of the remaining HomeLink buttons.
â– Programming a rolling code system
Two or more people may be needed to complete rolling code programming.
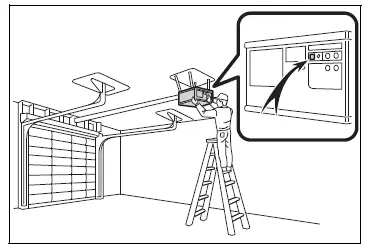
1. Locate the "Learn" or "Smart" button on the garage door opener motor in the garage.
This button can usually be found where the hanging antenna wire is attached to the unit. The name and color of the button may vary by manufacturer. Refer to the owner's manual supplied with the garage door opener motor for details.
2. Press and release the "Learn" or "Smart" button.
Perform 3 within 30 seconds after performing 2.
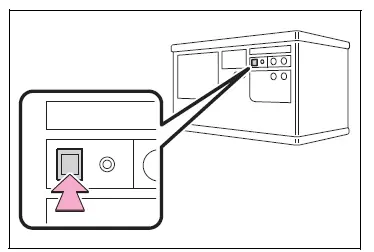
3. Press and hold the desired HomeLink button (inside the vehicle) for 2 seconds and release it. Repeat this sequence (press/hold/release) up to 3 times to complete programming.
If the garage door opener motor operates when the HomeLink button is pressed, the garage door opener motor recognizes the HomeLink signal.
â– Enabling 2-way communication with a garage door (only available for compatible devices)
When enabled, 2-way communication allows you to check the status of the opening and closing of a garage door through indicators in your vehicle.
2-way communication is only available if the garage door opener motor used is a compatible device. (To check device compatibility, refer to www.homelink.com.)
1. Within 5 seconds after programming the garage door opener has been completed, if the garage door opener motor is trained to HomeLink, both garage door operation indicators will flash rapidly (green) and the light on the garage door opener motor will blink twice, indicating that 2-way communication is enabled.
If the indicators do not flash, perform 2 and 3 within the first 10 presses of the HomeLink button after programming has been completed.
2. Press a programmed HomeLink button to operate a garage door.
3. Within 1 minute of pressing the HomeLink button, after the garage door operation has stopped, press the "Learn" or "Smart" button on the garage door opener motor. Within 5 seconds of the establishment of 2-way communication with the garage door opener, both garage door operation indicators in the vehicle will flash rapidly (green) and the light on the garage door opener motor will blink twice, indicating that 2-way communication is enabled.
â– Reprogramming a single HomeLink button
When the following procedure is performed, buttons which already have devices registered to them can be overwritten:
1. Press and hold the desired HomeLink button.
2. When the HomeLink indicator starts flashing orange, release the HomeLink button and perform "Programming HomeLink" 1 (it takes 20 seconds for the HomeLink indicator to start flashing).
â– Before programming
- Install a new battery in the transmitter.
- The battery side of the transmitter must be pointed away from the HomeLink buttons.
 Garage door opener
The garage door opener can
be programmed using the
HomeLink to operate
garage doors, gates, entry
doors, door locks, home
lighting systems, security
systems, and other devices.
â– HomeLink programming ...
 Operating HomeLink
Press the appropriate
HomeLink button. The
HomeLink indicator light
should turn on.
The status of the opening and
closing of a garage door is
shown by the garage door operation
indicators.
Vehicles w ...
Other materials:
Reassembly (2005/11-2006/01)
Install drive shaft bearing case subassembly
Using sst and a press, press in the drive shaft
bearing case to the inboard joint rh.
Sst 09527-10011, 09710-04081
Notice:
The bearing should be installed completely.
Using a snap ring expander, install a new drive shaft
hole ...
Engine coolant temperature circuit range / performance problem
Description
Refer to dtc p0115 (see page es-105).
Monitor description
Engine coolant temperature (ect) sensor cold start monitor
When a cold engine start is performed and then the engine is warmed up, if
the ect sensor value does
not change, it is determined that a malfunction has occ ...
Coolant
Replacement
Remove no. 1 Engine under cover
Drain engine coolant
Loosen the radiator drain cock plug.
Hint:
Collect the coolant in a container and dispose of it
according to the regulations in your area.
Remove the radiator reservoir cap.
Caution:
Do not remove the radiator ...
