
Toyota RAV4 (XA50) 2019-2026 Owners Manual: Inside rear view mirror
The rear view mirror's position can be adjusted to enable sufficient confirmation of the rear view.
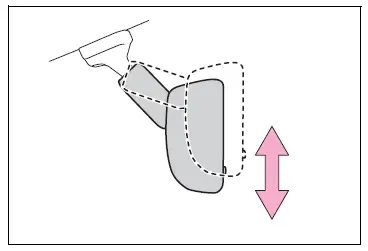
Adjusting the height of rear view mirror
The height of the rear view mirror can be adjusted to suit your driving posture.
Adjust the height of the rear view mirror by moving it up and down.
WARNING
â– Caution while driving
Do not adjust the position of the mirror while driving.
Doing so may lead to mishandling of the vehicle and cause an accident, resulting in death or serious injury.
Anti-glare function (vehicles with manual antiglare inside rear view mirror)
Reflected light from the headlights of vehicles behind can be reduced by operating the lever.
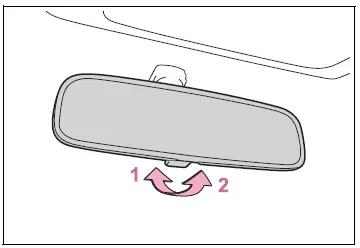
- Normal position
- Anti-glare position
Anti-glare function (vehicles with auto anti-glare inside rear view mirror)
Responding to the level of brightness of the headlights of vehicles behind, the reflected light is automatically reduced.
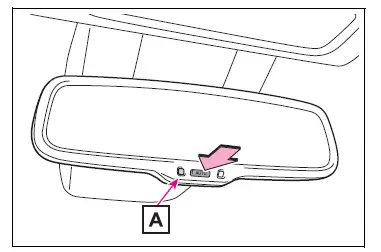
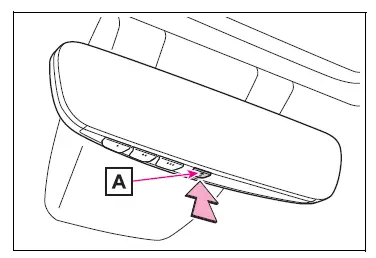
Changing automatic anti-glare function mode on/off When the automatic anti-glare function is in ON mode, the indicator A illuminates.
The function will set to ON mode each time the engine switch is turned to ON.
Pressing the button turns the function to OFF mode. (The indicator A also turns off.)
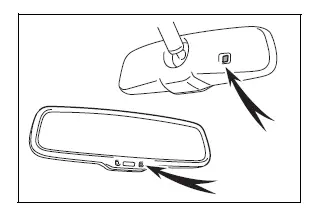
Vehicles without garage door opener
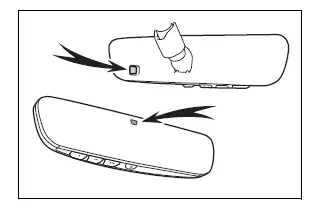
Vehicles with garage door opener
â– To prevent sensor error (vehicles with auto anti-glare inside rear view mirror)
To ensure that the sensors operate properly, do not touch or cover them.
Vehicles without garage door opener
Vehicles with garage door opener
 Steering wheel
Adjustment procedure
1. Hold the steering wheel and
push the lever down.
2. Adjust to the ideal position by
moving the steering wheel
horizontally and vertically.
After adjustment, pull the lever up ...
 Digital Rear-view Mirror
The Digital Rear-view Mirror
is a system that uses the
camera on the rear of the
vehicle and displays its
image on the display of the
Digital Rear-view Mirror.
The Digital Rear-view Mirror
can be cha ...
Other materials:
Removal
Notice:
Do not heat the vehicle body, emblem and name plate
excessively.
Hint:
When removing the emblem and name plate, heat the vehicle
body, emblem and name plate using a heat light.
Standard heating temperature
Remove no. 1 Back door emblem assembly
Put protective tape aroun ...
Precaution
Handling precautions for srs airbag
system
Handling precautions for srs airbag system (see
page rs-1).
Handling precautions for steering
column
When handling the steering column assembly.
Avoid any impact to the steering column
assembly, especially to the motor or ...
Headlight switch
The headlights can be operated
manually or automatically.
Turning on the headlights
Operating the switch
turns on the lights as follows:
U.S.A. (Type A)
The side marker, parking,
tail, license plate, instrument
panel lights, and
daytime running lights turn on.
The headlights and all
light ...
