Toyota RAV4 (XA40) 2013-2018 Service Manual: Rear differential side gear shaft oil seal
Components
Removal
- Drain differential oil (see page df-10)
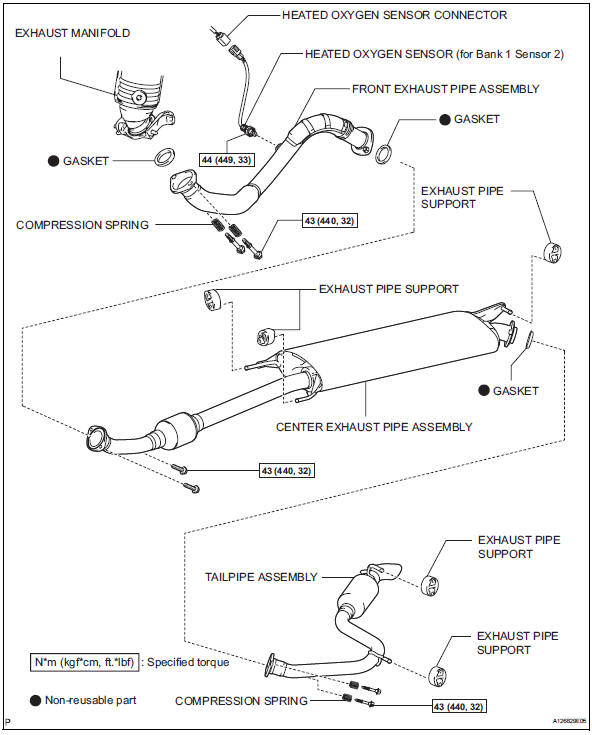
- Remove tailpipe assembly
- Remove the tailpipe (see page ex-2).
- Remove center exhaust assembly
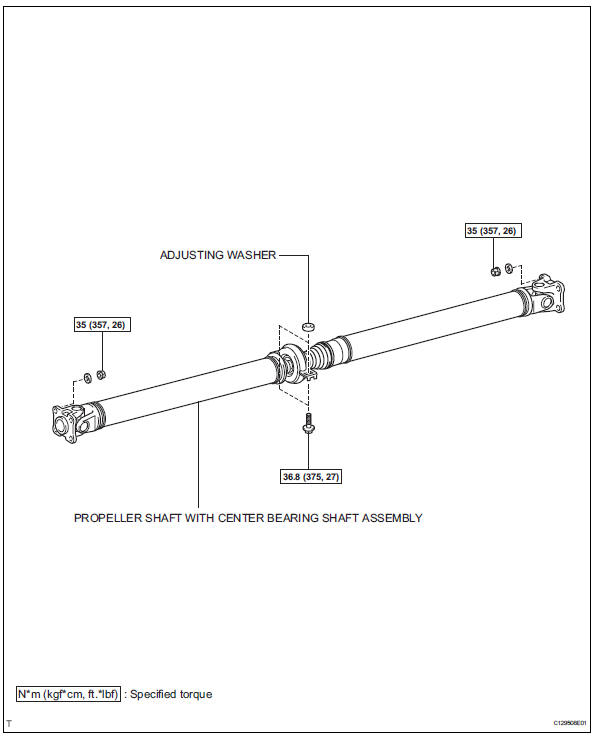
- Remove propeller with center bearing shaft assembly (see page pr-3)
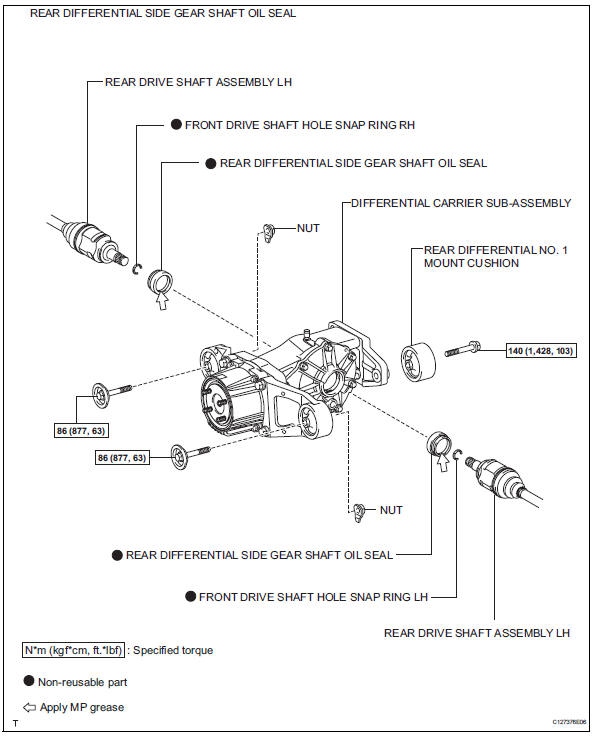
- Remove rear differential carrier subassembly (see page df-18)
- Remove rear differential side gear shaft oil seal
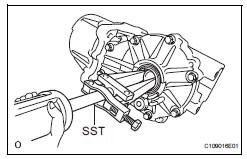
- Using a sst, tap out the 2 oil seals.
Sst 09308-00010
Installation
- Install rear differential side gear shaft oil seal
- Apply a light coat of mp grease to the lip of a new rear differential side gear shaft oil seal.
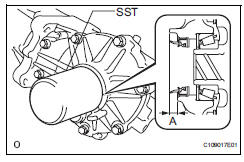
- Using sst and a hammer, tap the 2 rear differential side gear shaft oil seals into the rear differential carrier and differential side bearing retainer according to the specification.
Sst 09223-00010
Standard oil seal tapping amount (a value): 7.2 +-0.5 Mm (0.28 +-0.02 In.)
- Install rear differential carrier assembly (see page df-44)
- Temporarily install propeller with center bearing shaft assembly (see page pr-5)
- Tighten propeller with center bearing shaft assembly (see page pr-6)
- Inspect and adjust joint angle (see page pr- 4)
- Install center exhaust pipe assembly
- Install the center pipe (see page ex-5).
- Install tailpipe assembly
- Install the tailpipe (see page ex-6).
- Add differential oil
- Add differential oil (see page df-3).
- Check for differential oil leakage
- Check for exhaust gas leakage
If gas is leaking, tighten the areas necessary to stop the leak. Replace damaged parts as necessary.
 Differential oil
On-vehicle inspection
Check differential oil
Stop the vehicle on a level surface.
Using a 10 mm socket hexagon wrench, remove the
rear differential filler plug and gasket.
...
 Diaphragm oil seal
Components
Removal
Drain differential oil
Using a 10 mm socket hexagon wrench, remove the
rear differential drain plug and gasket, and drain the
oil.
Install a new gasket to t ...
Other materials:
Compressor and pulley (for 2az-fe)
Components
Removal
Discharge refrigerant from
refrigeration system (see page ac-172)
Disconnect cable from negative battery
terminal
Caution:
Wait at least 90 seconds after disconnecting the
cable from the negative (-) battery terminal to
prevent airbag and seat belt pretensione ...
Precaution
Handling precaution
When handling the electronic parts:
Avoid any impact to electronic parts such as
ecus and relays. Replace with new ones if
dropped or subjected to a severe blow.
Do not expose any electronic parts to high
temperatures and humidity.
Do not touch the connec ...
Installation
Hint:
Use the same procedures for the rh side and lh side.
The procedures listed below are for the lh side.
Install no. 2 Seat leg box protector
Attach the clip to install the protector.
Install the clip.
Install rear no. 1 Floor mat support side plate
Install rear no ...
