Toyota RAV4 (XA40) 2013-2018 Service Manual: Parking brake assembly
Components
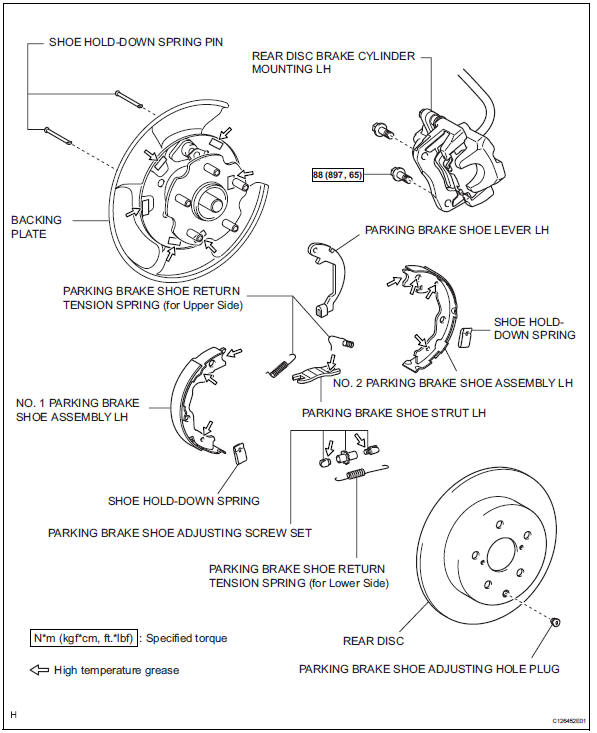
Disassembly
Hint:
- Use the same procedures for the lh side and rh side.
- The procedures listed below are for the lh side.
- Remove rear wheel
- Disconnect rear disc brake cylinder mounting lh (see page br-55)
- Remove parking brake shoe adjusting hole plug
- Remove the shoe adjusting hole plug from the rear disc.
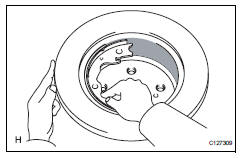
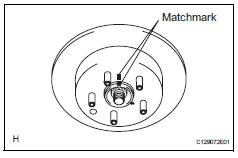
- Remove rear disc
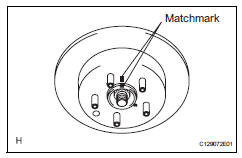
- Put matchmarks on the disc and axle hub.
- Release the parking brake.
- Turn the shoe adjuster until the disc turns freely, and then remove the disc.
- Install the shoe adjusting hole plug to the disc.
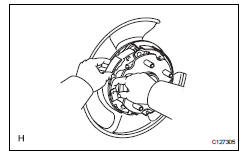
- Remove parking brake shoe return tension spring (for upper side)
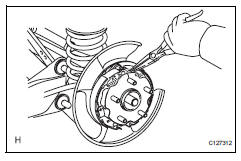
- Using needle-nose pliers, remove the 2 shoe return tension springs.
- Remove parking brake shoe strut lh
- Remove parking brake shoe return tension spring (for lower side)
- Using needle-nose pliers, remove the tension spring.
- Remove parking brake shoe adjusting screw set
- Remove the screw set.
- Remove no. 1 Parking brake shoe assembly lh
- Press the shoe hold-down spring to remove the pin, shoe hold-down spring and shoe.
- Remove no. 2 Parking brake shoe assembly lh
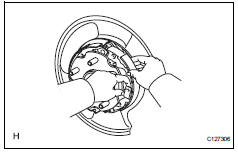
- Slide the shoe to remove the shoe hold-down spring, pin and shoe.
- Disconnect the parking brake cable from the parking brake shoe lever.
- Remove parking brake shoe lever lh
Inspection
- Check brake disc inside diameter

- Using a drum gauge or equivalent, measure the inside diameter of the disc.
Standard inside diameter: 172 mm (6.77 In.)
Maximum inside diameter: 173 mm (6.81 In.)
If the inside diameter is greater than the maximum, replace the disc.
- Check parking brake shoe lining thickness
- Using a ruler, measure the shoe lining thickness.
Standard thickness: 3.5 Mm (0.138 In.)
Minimum thickness: 1.0 Mm (0.039 In.)
If the shoe lining thickness is equal to or less than the minimum, replace the brake shoe assembly.
- Check brake disc and parking brake shoe lining for proper contact
- Apply chalk to the inside surface of the disc. Touch
the brake shoe to the disc and check that there is
full contact between the brake shoe and disc (white
chalk is transferred to the entire brake shoe).
If the contact is not as specified, use a shoe grinder to repair the brake shoe, or replace the brake shoe assembly.
Reassembly
Hint:
- Use the same procedures for the lh side and rh side.
- The procedures listed below are for the lh side.
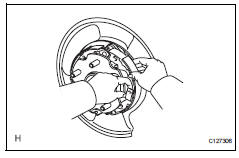
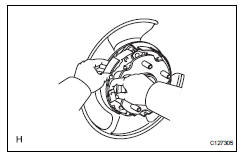
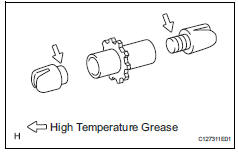
- Apply high temperature grease
- Apply high temperature grease to the contact surface of the shoe and backing plate.
- Install parking brake shoe lever lh
- Install no. 2 Parking brake shoe assembly lh
- Connect the parking brake cable to the parking brake shoe lever.
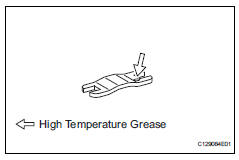
- Apply high temperature grease to the following contact surfaces of the shoe.
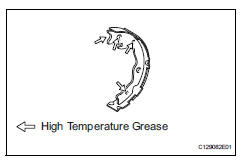
- Shoe to anchor pin
- Shoe to parking brake lever pin
- Shoe to spring
- Install the shoe with the shoe hold-down spring and pin.
- Install no. 1 Parking brake shoe assembly lh
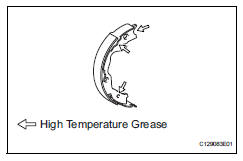
- Apply high temperature grease to the following contact surfaces of the shoe.
- Shoe to anchor pin
- Shoe to spring
- Install the shoe with the shoe hold-down spring and pin.
- Install parking brake shoe adjusting screw set
- Apply high temperature grease to the adjusting bolt.
- Install the screw set.
- Install parking brake shoe return tension spring (for lower side)
- Using needle-nose pliers, install the tension spring.
- Install parking brake shoe strut lh
- Apply high temperature grease to the contact surface of the strut and shoe return tension spring.
- Install the strut.
- Install parking brake shoe return tension spring (for upper side)
- Using needle-nose pliers, install the 2 shoe return tension springs.
- Check parking brake installation
- check that each part is installed properly.
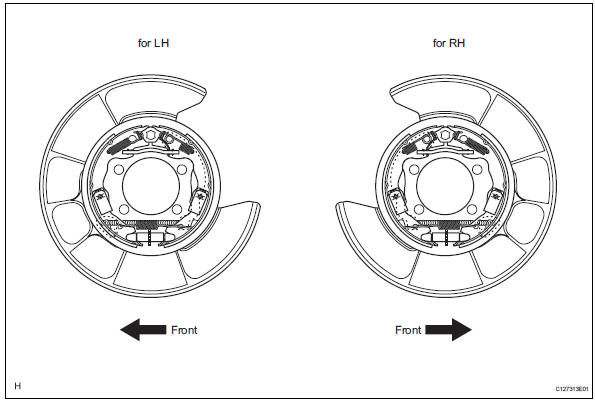
Notice:
There should be no oil or grease adhering to the friction surface of the shoe lining and disc.
- Install rear disc
- Align the matchmarks and install the disc.
Hint:
When replacing the disc with new one, select the installation position where the disc has the minimum runout.
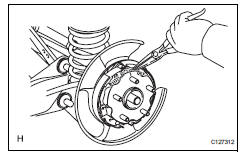
- Adjust parking brake shoe clearance
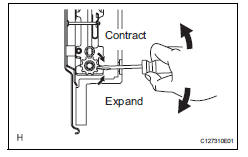
- Temporarily install the hub nuts.
- Remove the shoe adjusting hole plug, and then turn the adjuster to expand the shoe adjuster until the disc locks.
- Turn and contact the shoe adjuster until the disc can rotate smoothly
Standard return notch: 8 notches
- Check that the shoe has no brake drag.
- Install parking brake shoe adjusting hole plug
- Install the shoe adjusting hole plug to the rear disc.
- Connect rear disc brake cylinder mounting lh (see page br-60)
- Install rear wheel torque: 103 n*m (1,050 kgf*cm, 76 ft.*Lbf)
- Drive vehicle
- Pull the parking brake lever with a force of 147 n (15 kgf, 33 lbf).
- Drive the vehicle at approximately 50 km/h (31 mph) for approximately 400 m (0.25 Miles).
Notice:
Drive the vehicle on a safe, level and dry road.
- Repeat the above steps 2 or 3 times.
- Check parking brake lever travel (see page pb-1)
- Adjust parking brake lever travel (see page pb-2)
 Parking brake cable
Components
Removal
Remove rear console box sub-assembly
Remove the rear console box (see page ip-16).
Hint:
Refer to the procedures from the removal of the no.
1 Console upper p ...
 Power steering
...
Other materials:
Problem symptoms table
Hint:
Use the table below to help determine the cause of the
problem symptom. The potential causes of the symptoms
are listed in order of probability in the "suspected area"
column of the table. Check each symptom by checking the
suspected areas in the order they are listed. Re ...
Air inlet control servo motor
Components
Removal
Remove blower assembly
Remove the blower (see page ac-203).
Remove air inlet control servo motor (see
page ac-210)
Inspection
Inspect air inlet control servo motor (for automatic air conditioning
system)
Inspect the servo motor operation. ...
Components
...
