Toyota RAV4 (XA40) 2013-2018 Service Manual: On-vehicle inspection
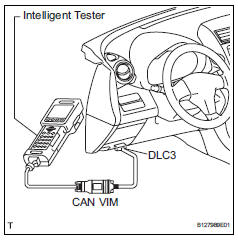
- Connect intelligent tester
- Connect the intelligent tester to the dlc3.
- Start the engine and idle it.
- Select the active test mode on the intelligent tester.
Hint:
Please refer to the intelligent tester operator's manual for further details.
- Check actuator motor operation
Notice:
Do not keep a motor relay on for more than 5 seconds. When operating it consecutively, wait 20 seconds between each operation.
- Turn the motor relay on and check the actuator motor operation noise.
- Turn the motor relay off.
- Fully depress the brake pedal and hold it for approximately 15 seconds. Check that the pedal's initial depth is maintained for the entire 15 seconds.
- Turn the motor relay on and check that the pedal does not pulsate.
- Turn the motor relay off and release the pedal.
- Check brake actuator solenoid (for front right wheel)
Notice:
- Be sure to follow the procedures below when turning on a solenoid.
- Do not keep a solenoid on for more than 10 seconds. When operating it consecutively, wait 20 seconds between each operation.
- Do not keep a motor relay on for more than 5 seconds. When operating it consecutively, wait 20 seconds between each operation.
- With the pedal depressed as much as possible, perform the following operations.
- Turn the sfrh and sfrr solenoids on simultaneously, and check that the pedal cannot be depressed further.
- Turn the sfrh and sfrr solenoids off simultaneously, and check that the pedal can be depressed further.
- Turn the motor relay on. Check that the pedal returns to the "depressed as much as possible" position.
- Turn the motor relay off and release the pedal.
- Check brake actuator solenoid (for front left wheel)
- Use the same procedures described for the front right wheel to check the solenoids of the front left wheel.
Hint:
Front left wheel: sflh, sflr
- Check brake actuator solenoid (for rear right wheel)
- Use the same procedures described for the front right wheel to check the solenoids of the rear right wheel.
Hint: rear right wheel: srrh, srrr
- Check brake actuator solenoid (for rear left wheel)
- Use the same procedures described for the front right wheel to check the solenoids of the rear left wheel.
Hint: rear left wheel: srlh, srlr
- Check and clear dtc
- Check and clear the dtc (see page bc-47).
 Abs and traction actuator
Components
...
 Removal (2005/11-2006/01)
Disconnect cable from negative battery
terminal
Caution:
Wait at least 90 seconds after disconnecting the
cable from the negative (-) battery terminal to
prevent airbag and seat belt prete ...
Other materials:
Blower unit
Components
Removal
Disconnect cable from negative battery
terminal
Caution:
Wait at least 90 seconds after disconnecting the
cable from the negative (-) battery terminal to
prevent airbag and seat belt pretensioner activation.
Remove upper instrument panel
Remove the upper ...
If the engine
will not start
If the engine will not start even though correct starting procedures
are being followed („_p. 197, 200), Consider each of the following
points:
The engine will not start even though the starter motor operates
normally.
One of the following may be the cause of the problem:
There may not be ...
Throttle / pedal position sensor / switch "d" circuit range / performance
Description
Hint:
Refer to dtc p2120 (see page es-282).
Monitor description
When the difference between the output voltages of vpa and vpa2 deviates from
the standard, the ecm
determines that the accelerator pedal position (app) sensor is malfunctioning.
The ecm turns on the mil
and th ...
