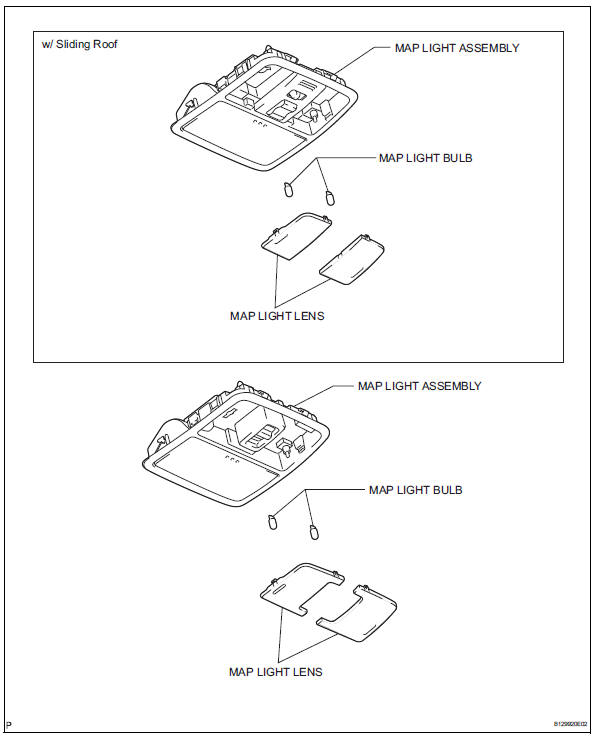
Toyota RAV4 (XA40) 2013-2018 Service Manual: Map light assembly
Components
Removal
- Disconnect cable from negative battery terminal
Caution:
Wait at least 90 seconds after disconnecting the cable from the negative (-) battery terminal to prevent airbag and seat belt pretensioner activation.
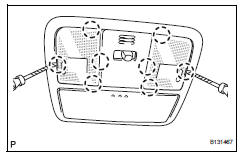
- Remove map light assembly
- Detach the 4 clips and remove the map light.
- Disconnect the light connector.
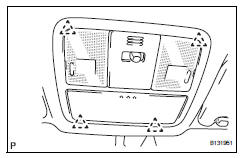
- Remove map light lens
- Using a screwdriver, pry out the 8 claws and remove the map light lens.
Hint:
Tape the screwdriver tip before use.
Disassembly
- Remove map light bulb
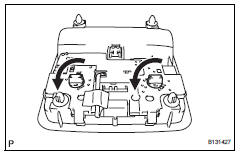
- Remove the 2 bulbs from the light.
Inspection
- Inspect map light assembly
- Connect the battery's positive (+) lead to terminal 6 and the negative (-) lead to terminal 1, and then check that the light comes on when the switch is in the door position.
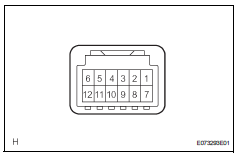
Ok: light comes on.
If the result is not as specified, replace the light assembly.
- Connect the battery's positive (+) lead to terminal 6 and the negative (-) lead to terminal 7, and then check that the light comes on when the switch is in the on position.
Ok: light comes on.
If the result is not as specified, replace the light assembly.
Reassembly
- Install map light bulb
- Install the 2 bulbs to the light.
Installation
- Install map light lens
- Attach the 8 claws to install the map light lens.
- Install map light assembly

- Connect the light connector.
- Attach the 4 clips to install the map light.
- Connect cable to negative battery terminal
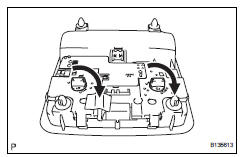
 High mounted stop light assembly
Components
Removal
Disconnect cable from negative battery
terminal
Caution:
Wait at least 90 seconds after disconnecting the
cable from the negative (-) battery terminal to
prevent ai ...
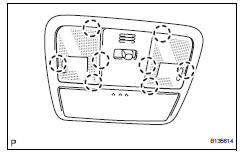
 Room light assembly
Components
Removal
Disconnect cable from negative battery
terminal
Caution:
Wait at least 90 seconds after disconnecting the
cable from the negative (-) battery terminal to
prevent ai ...
Other materials:
Removal
Disconnect cable from negative battery
terminal
Caution:
Wait at least 90 seconds after disconnecting the
cable from the negative (-) battery terminal to
prevent airbag and seat belt pretensioner activation.
Remove no. 1 Engine under cover
Remove front fender apron rh
Remove radia ...
Parking brake cable
Components
Removal
Remove rear console box sub-assembly
Remove the rear console box (see page ip-16).
Hint:
Refer to the procedures from the removal of the no.
1 Console upper panel garnish up until the removal
of the rear console box sub-assembly.
Loosen lock nut and no. ...
Front occupant classification sensor rh circuit malfunction
Description
The front occupant classification sensor rh circuit consists of the occupant
classification ecu and the
front occupant classification sensor rh.
Dtc b1781 is recorded when a malfunction is detected in the front occupant
classification sensor rh
circuit.
Wiring diagram
...
