Toyota RAV4 (XA40) 2013-2018 Service Manual: Child restraint seat tether anchor
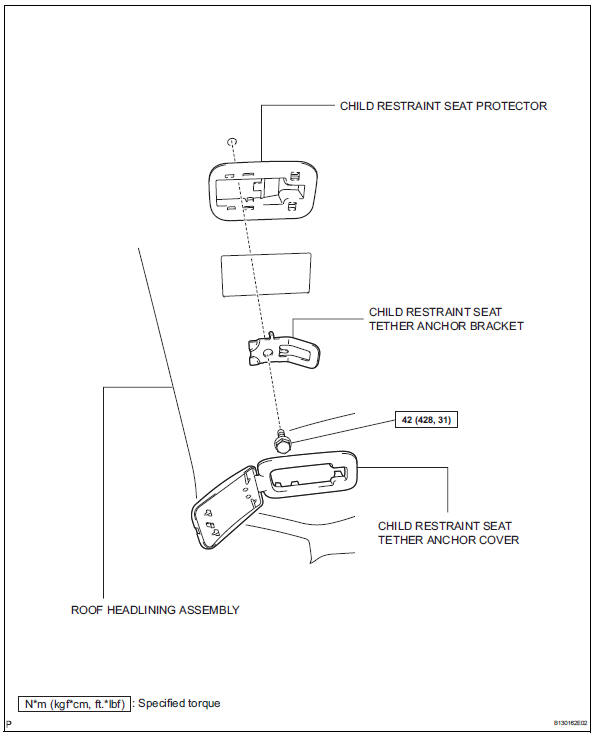
Components
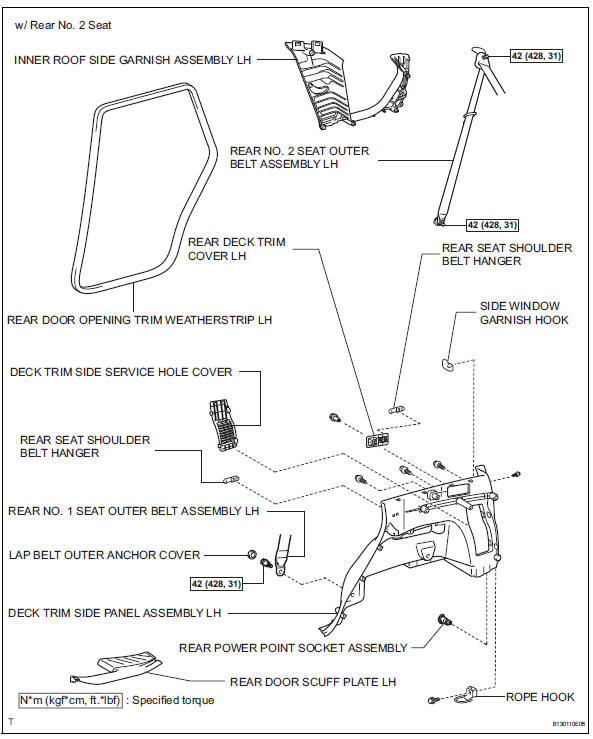
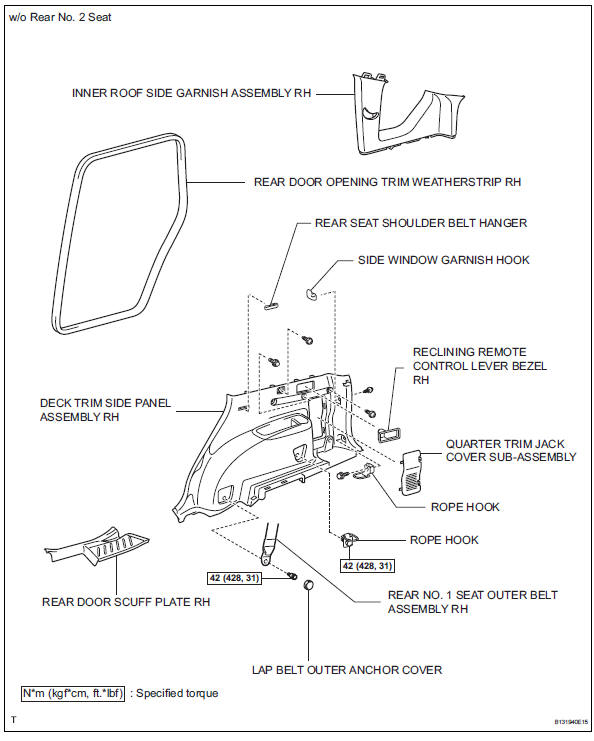
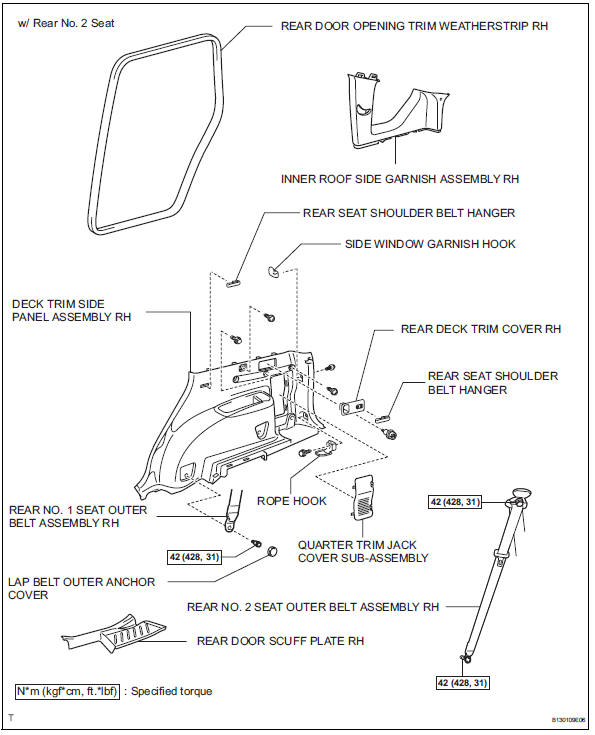
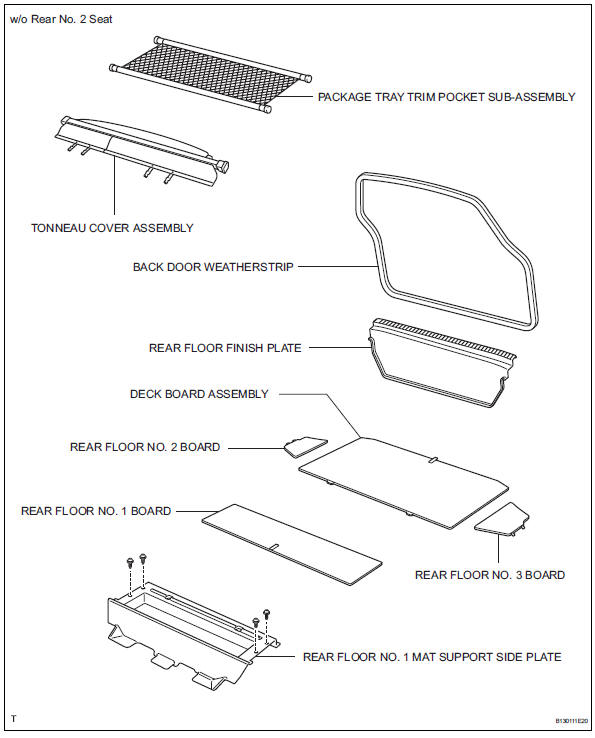
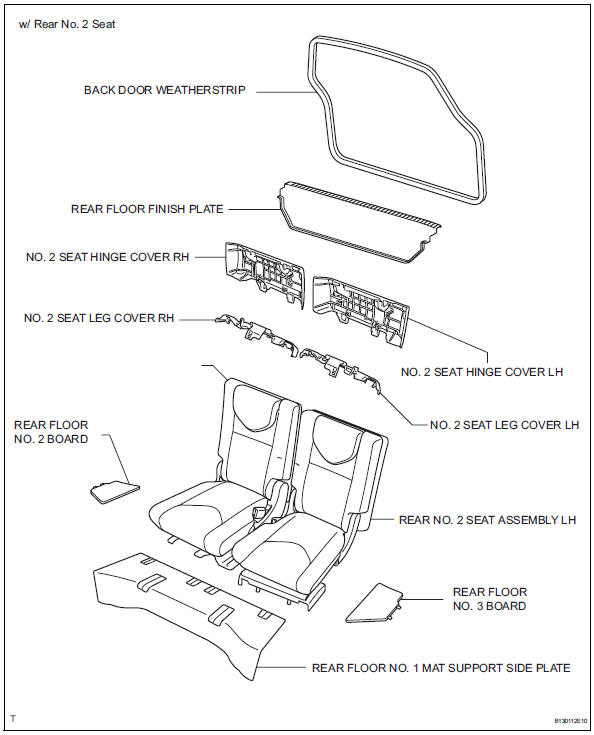
Removal
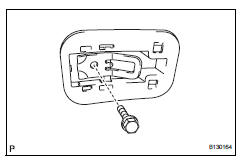
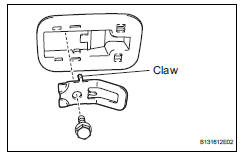
- Remove child restraint seat tether anchor cover
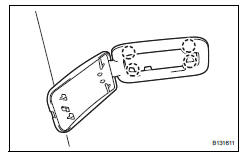
- Using a screwdriver, detach the 4 claws and remove the cover.
Hint:
Tape the screwdriver tip before use.
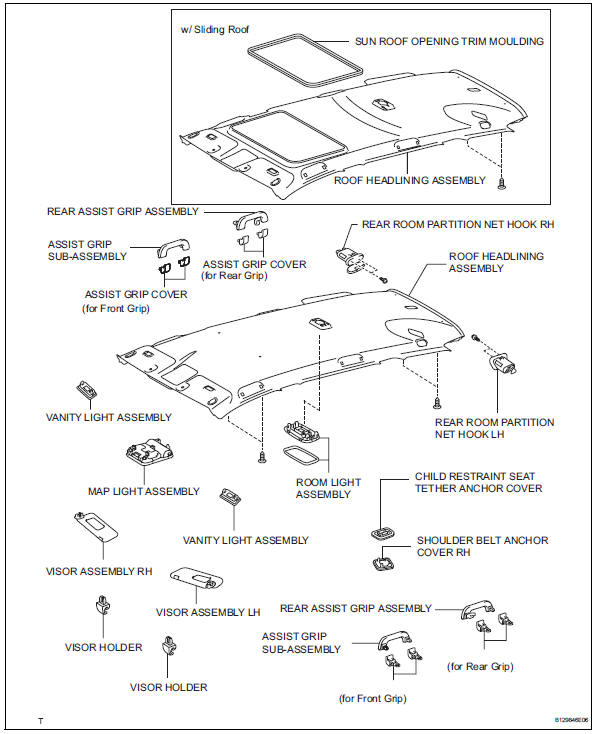
- Remove roof headlining assembly
Hint:
It is not necessary to completely remove the roof headlining. Slightly lower the rear section of the roof headlining.
- Partially remove the roof headlining (see page ir- 26).
- Remove child restraint seat tether anchor bracket
- Remove the bolt and bracket.
- Remove child restraint seat protector
Installation
- Install child restraint seat protector
- Install child restraint seat tether anchor bracket
- Align the claws with the positioning holes, and install
the bracket with the bolt.
Torque: 42 n*m (428 kgf*cm, 31 ft.*Lbf)
- Install roof headlining assembly
- Install the roof headlining (see page ir-49).
- Install child restraint seat tether anchor cover
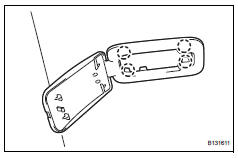
- Install the cover with the 4 claws.
 Rear center seat outer belt assembly
Components
Removal
Caution:
Wait at least 90 seconds after disconnecting the cable
from the negative (-) battery terminal to prevent airbag
and seat be ...
 Sliding roof
...
Other materials:
Rear shock absorber
Components
Removal
Hint
Use the same procedures for the rh side and lh side.
The procedures listed below are for the lh side.
Remove rear wheel
Remove rear shock absorber assembly lh
Support the no. 2 Suspension arm lh with a jack.
Notice:
Place a wooden or rubber b ...
Preparations to
use wireless
communication
The following can be performed using bluetooth® wireless communication:
A portable audio player can be operated and listened to via
audio system
Hands-free phone calls can be made via a cellular phone
In order to use wireless communication, register and connect a
bluetooth® device by p ...
Evaporative emission leak detection pump
Dtc summary
Hint:
The leak detection pump is built into the canister pump module.
Description
The description can be found in the evap (evaporative emission) system (see
page es-335).
Inspection procedure
Refer to the evap system (see page es-340).
Monitor description
5 Hours* afte ...
